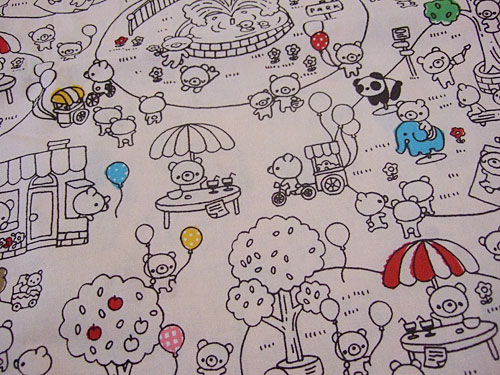
Here, finally, are some pics of the tunic top I sewed from One-Piece Dresses and Tunics. It turned out well in the end, but it wasn’t quite the simple process I was hoping for! Before I go into detail, a note on the fabric – I bought it back in 2008 from Superbuzzy – it’s a light peachy pink and it really looks like someone started colouring it in with felt pens! I love it so I’m glad it’s finally getting used. I can’t find a name for the fabric but I see it on Etsy now and again so there’s still some out there.
On to the making! Firstly, I want to recommend Japanese Sewing Books, a blog which aims to help people using Japanese sewing books. The guide to tracing the patterns was incredibly helpful – I probably would have figured it out myself but this explains everything brilliantly with translations for the measurements and things. Having measured myself, I traced the largest pattern, which was just one piece for this dress – very easy! I thought I was being very clever tracing on to freezer paper since it would stick to the fabric without pins for cutting. However, mine seems to have lost its stick so that didn’t work. It’s still a great idea though, if you can get a fresh roll (Glasgow folks – I’ve seen it in Mandors).
I also discovered my fabric wasn’t quite as big as I thought so I shortened the pattern length by rather a lot. After sewing the shoulders I discovered the neckline was far too wide and high so I cut it down a bit at the front. I guess I have narrow shoulders. I then sewed up the sides and realised it was all too big. I think it’s supposed to be quite flowing but my fabric was a bit heavier so it just looked gigantic. At this point, I decided that after embracing pressing and pinning a while back, I should probably start basting things too (ie. sewing big loose stitches in a bright colour to remove later). Doing that, I got the sides perfect and also added a couple of darts to the front neckline to bring it in.

I then sewed bias tape around the neckline but I don’t think I was doing it right or my tape was too narrow because it didn’t stitch all the way through on some parts and it all just started falling off. Disaster! Instead I just folded a double hem and sewed it up. I was going to hand-sew the bias tape on after but it actually looked really neat so I left it. I did the same on the armholes.
This is the point at which I wore it outside and realised the back neckline was still too wide and there was too much fabric at the back. I tried adding a dart but eventually I had to almost sew a seam up the middle and remove a big chunk of fabric. It looks okay and at least it fits properly now. Sorry for lack of me pics by the way – full length self portraits are way difficult without a tripod or something.
Anyway, now I have a working tunic top I can make a new paper pattern from, and hopefully I can use that as a reference when making up other designs from the book so they need less adjusting. I’m going to make my next one a bit longer and hopefully put in some patch pockets too!


