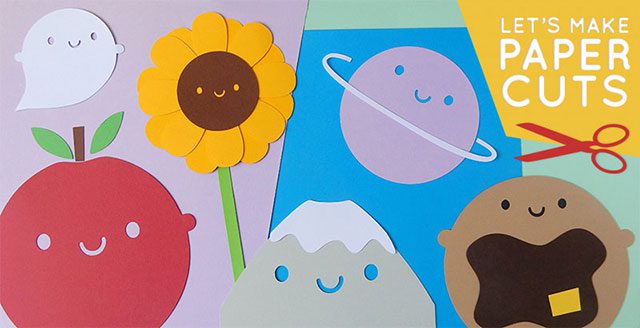
Time for a new paper craft tutorial to help you make cards and decorations featuring my cute characters! Want to make sure you don’t miss one? Join my mailing list!
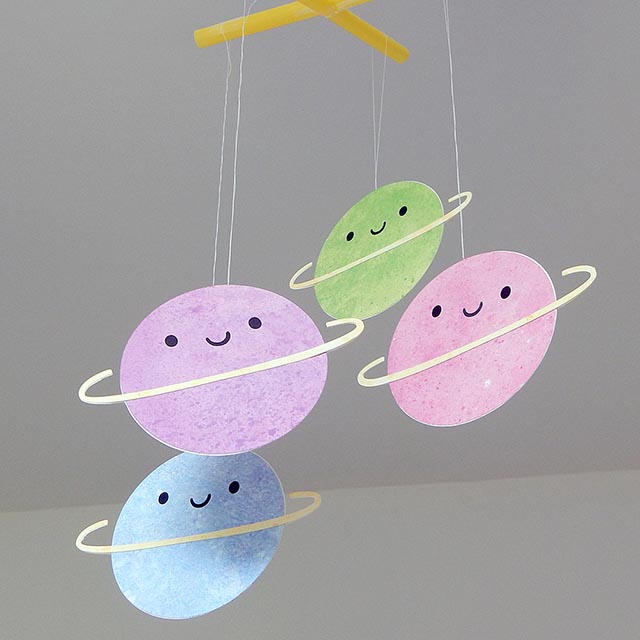
I always start these tutorials planning to make a card and some kind of decoration and then often I have a random brainwave. So this month you can make a cute Planet card that’s perfect for Father’s Day or this fun mobile to brighten up a room!
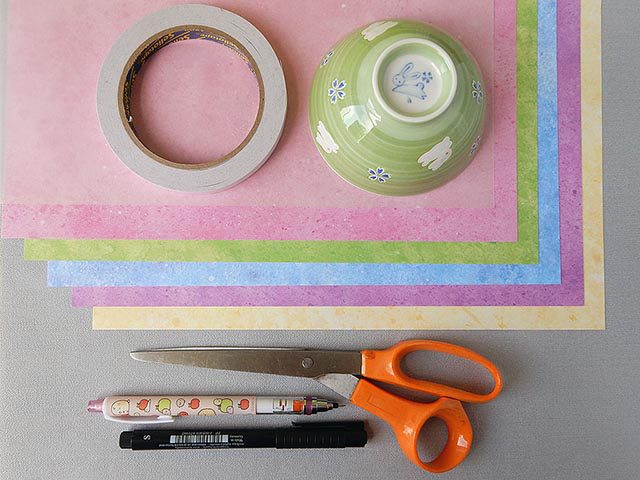
What you’ll need:
- Thin card in any colours you like – see note below
- Tracing paper
- Something round to draw around (see size below) or pair of compasses
- Pencil and eraser
- Black marker pen
- Scissors
- Double-sided tape or glue dots or glue stick
- My Draw Kawaii Faces free printable (optional)
- Additional items for making a mobile listed with the instructions further below
Instructions:
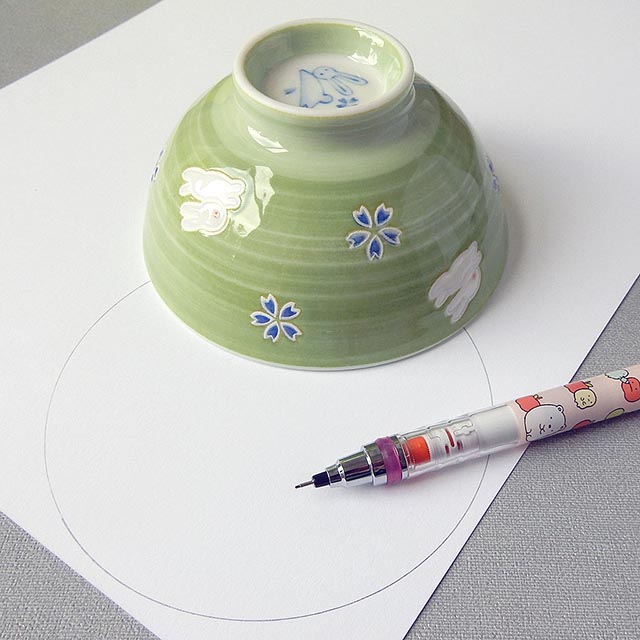
Find a suitable sized round object to draw around or set your compasses. For an A5 card, you want something around 9cm in diameter – I’m using a small bowl here. Draw around it on your choice of card with a pencil. If using patterned card, draw on the reverse.
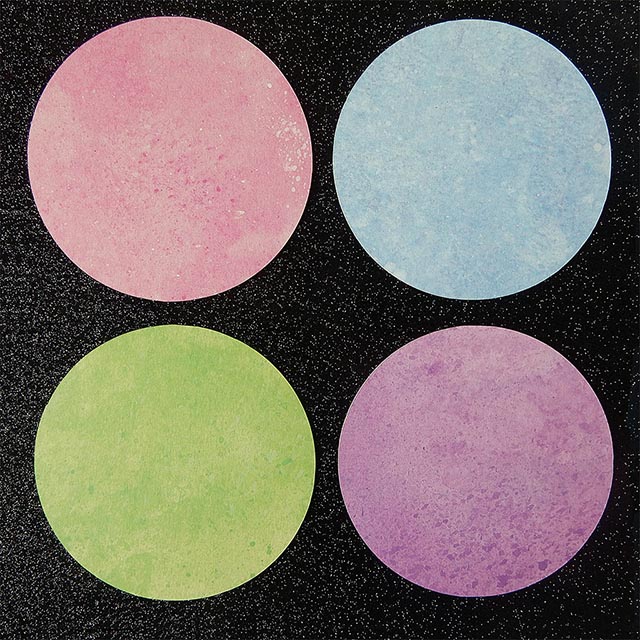
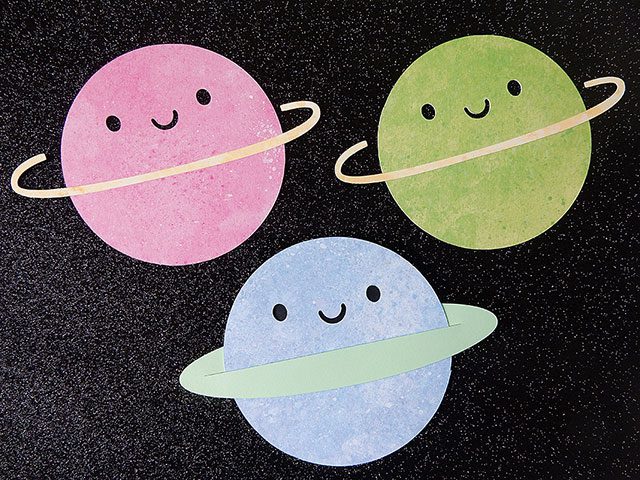
Cut it out and you’ve already got a planet! I got the marbled card from eBay – planets are a great opportunity to use some fun colours and patterns since they’re naturally swirled with different colours and textures.
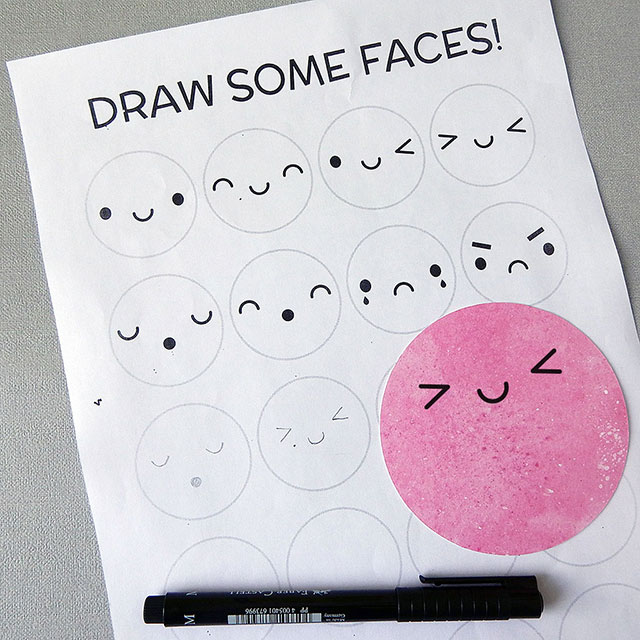
Time to add a face! As always, you can practice with my free Draw Kawaii Faces printable which has eight cute faces to choose from. If you’re still not confident, get your printer to scale it up and then use tracing paper to copy a face over. If you want to add rings, draw your face in the top half of the circle, otherwise you can put it anywhere. Pencil in first and then go over with a black marker pen.
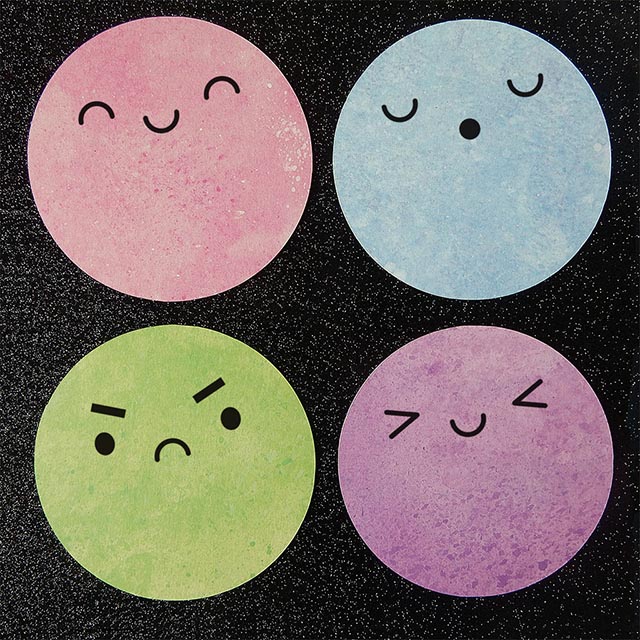
Here’s how some of the different faces look! I kind of wish I’d mixed mine up on the real ones I made but I didn’t have much card to experiment with.
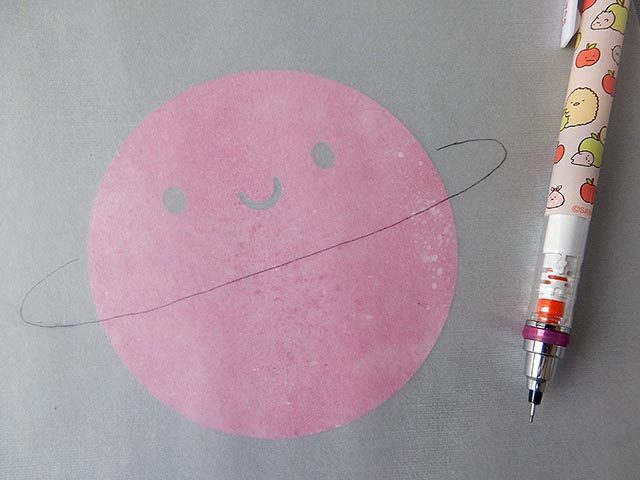
Now to add to add rings. I’ve got two ways to show you. For both, start by placing your tracing paper over the planet shape and then draw an oval shape around the middle. If you’re not good at drawing shapes freehand, find a plate or something with a large curve to help.
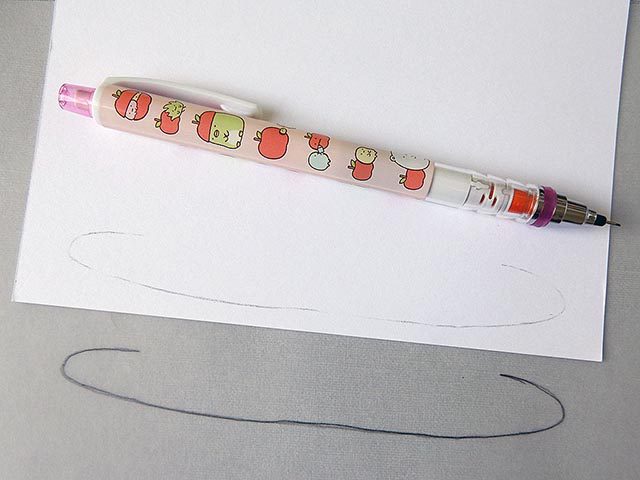
Draw over your rings again to make the line thicker and then turn over the tracing paper, place on a different colour of card and draw over the reverse of your line to transfer it. If you’re using patterned card, remember to do this on the back.
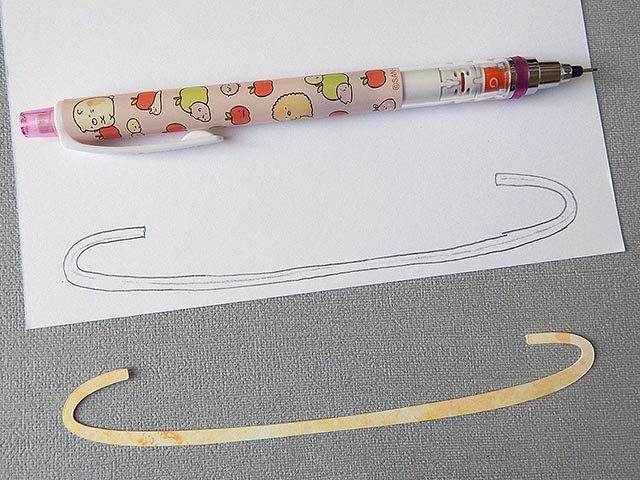
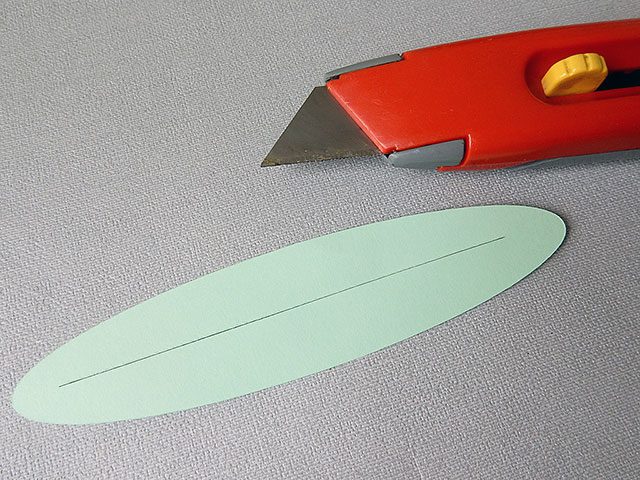
For the same rings as my Planet character, use the traced line as a guide to draw a thicker shape and cut out with a craft knife.
If that’s too fiddly for you, just join up the ends into an oval and cut a slit in the middle.
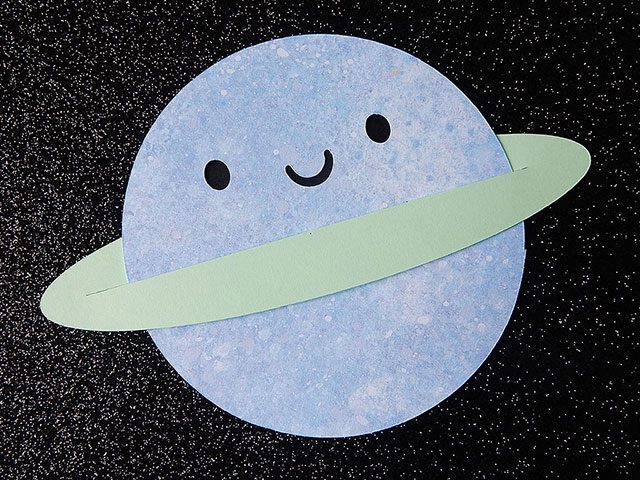
Then slide your planet through the slit – easy!
However you make it, stick your ring down with glue and you’ve got a finished planet! How cool is this black glitter card? I can’t recommend a seller for you as the one I bought from sent it in a paper envelope with a flimsy bit of card, which my postman had no trouble rolling up and shoving through my letterbox! Luckily it’s only a little bit creased.
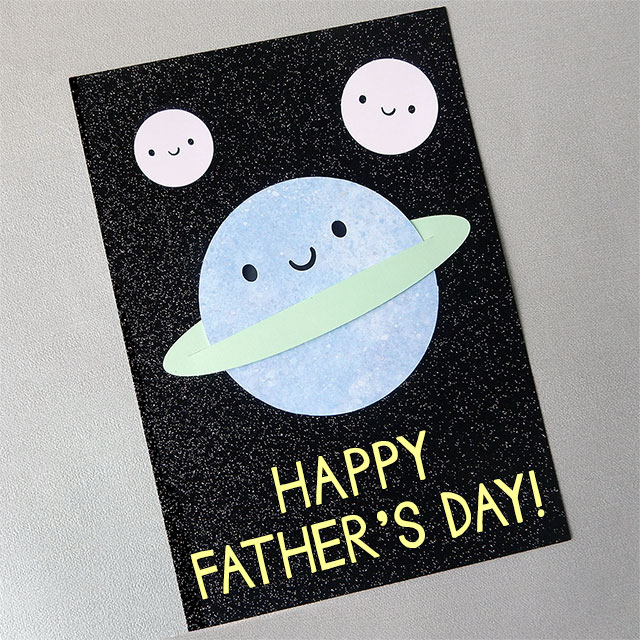
To make a card, just glue your planet down onto a folded piece of card (black or dark blue is best). Add text by hand or print your message separately and cut it into a speech bubble or other shape. For a Father’s Day card make a small moon for each child – just draw around something like a bottle top and add a face.
Read on if you’d like to make a mobile…
How to make a Planets mobile
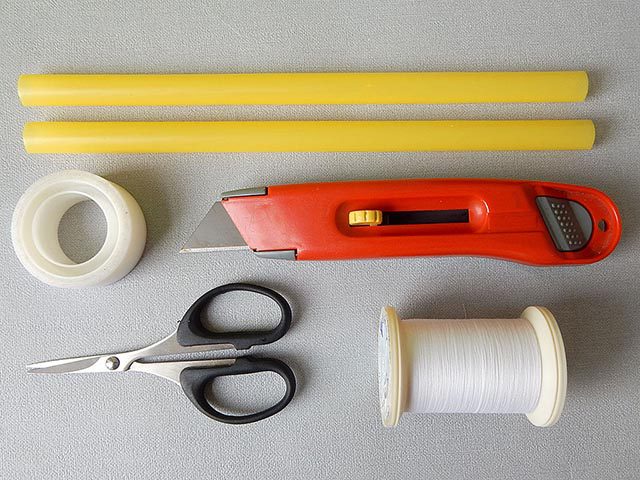
I’m not giving exact instructions here because I made it up as I went along with what I had in the house. Either google a tutorial for making a proper mobile or do whatever works for you. I used a couple of wide plastic straws (you can get these in IKEA or Lakeland), knife, magic tape, thread and sewing scissors. Wooden skewers or sticks would be great too.
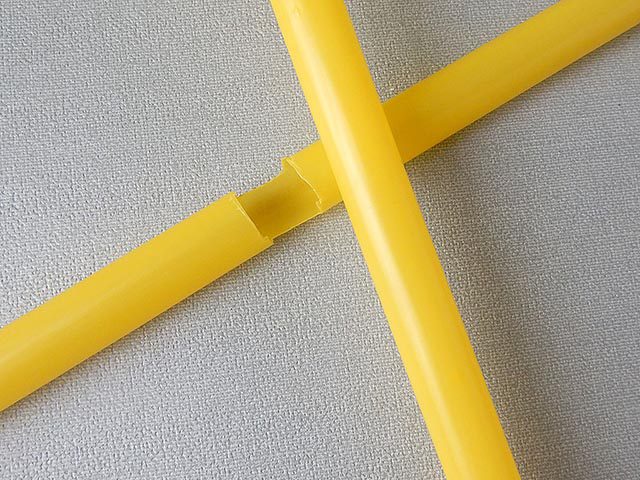
For the straws, I cut a gap in one and slotted them together and then stuck them down with magic tape.
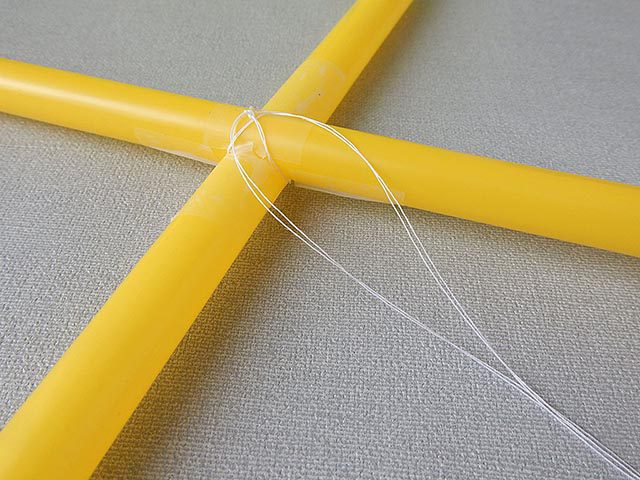
I then tied a long piece of doubled up thread around the middle that will be used for hanging it up.

Cut more thread (again, longer than you might need), double it up and add a few knots at one end to stop it sliding out of the tape. Stick the knotted end to the back of your planet with tape.
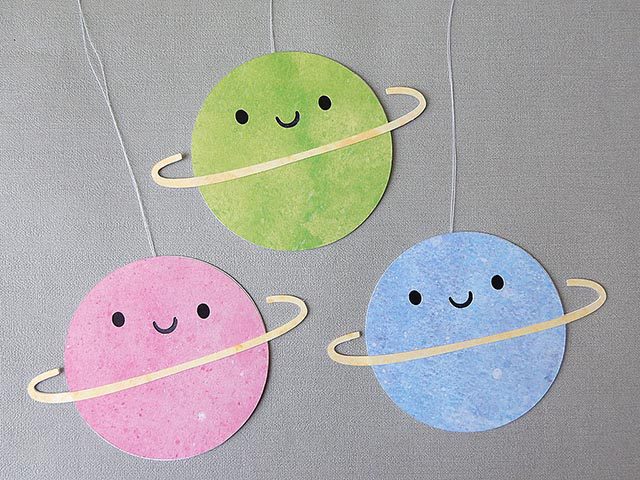
I made my planets double-sided so that they’d look cute from every angle. The simplest way is just to cut another circle for the back and glue it all together. And obviously, it’s much easier with the oval rings – I used my paper cutting machine to get these to match in reverse.
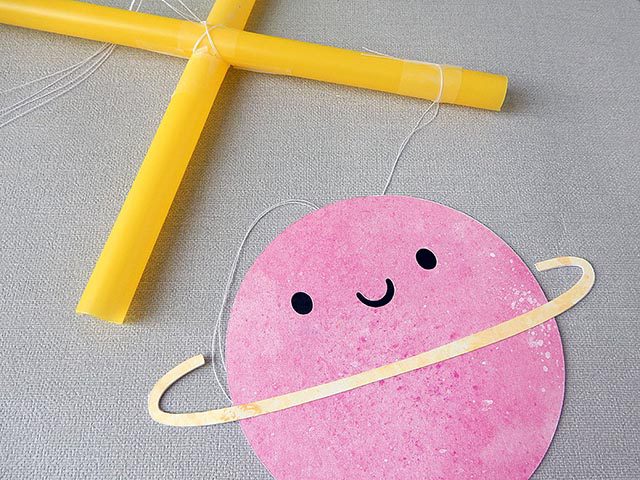
Once you’ve added thread to all your planets – I made four but you could make more – attach them to your straws. Make sure they’re all at different heights so they don’t block each other. I was going to poke holes in the straws for the thread but in the end I just taped them down so that they’d be easy to remove.
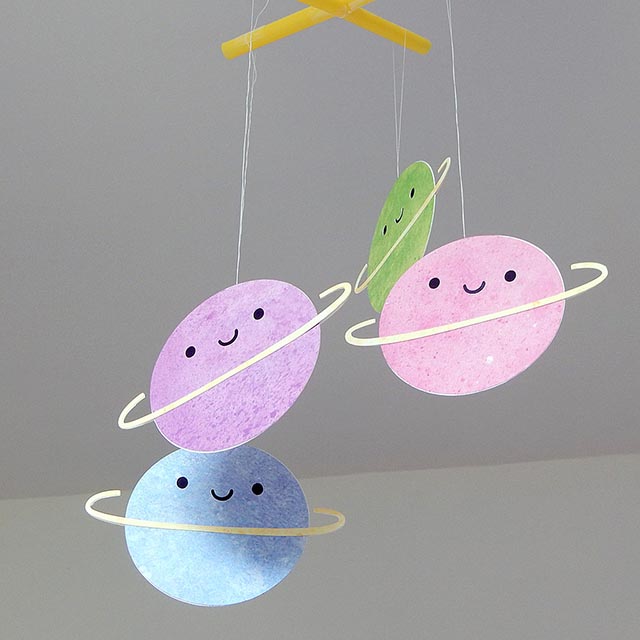
Hang it up somewhere (I tied mine to the bottom of a paper lampshade) and watch them move around in the breeze. I’ll add a video here later once I’ve shared it on Instagram. I hung these up in my studio and they look so cute that I might even move it to my bedroom so I’ll get to enjoy it more often.
If you make a Planet, I would love to see it! You can tag me on Instagram (@marcelinesmith) or Twitter (@marceline).
This tutorial is for personal use only! Please do not sell items you make or use this tutorial for profit. As with all content on this blog, the images and instructions are copyrighted © Marceline Smith 2017 and may not be reposted without credit and permission. Thank you for respecting the rights of artists and makers.